
Planning a kitchen remodel is the structured process of defining goals, layout, scope, permits, materials, and a build sequence to transform a kitchen efficiently and safely. Done right, it reduces surprises, protects your home, and delivers a functional, beautiful space. In The Meadows, SSJ Construction & Renovations guides homeowners through every step.
By Sandeep Singh — Owner, SSJ Construction & Renovations
Last updated: July 3, 2026
Above the Fold: Why This Guide Matters + Table of Contents
Use this complete guide to plan your kitchen remodel with confidence. It covers prerequisites, steps, layout options, timelines, risks, and troubleshooting—plus local tips for The Meadows. Follow the sequence, use the checklists, and lean on SSJ’s licensed team to keep your project organized, compliant, and on schedule.
Many homeowners start with ideas and inspiration but stall when decisions pile up. Here’s a fast, scannable map of what you’ll learn and how to use it.
- Quick Summary: The critical sequence and deliverables
- What & Why: Definitions and benefits of strong planning
- Prerequisites: Readiness checks before design
- Step-by-Step Plan: Tightly sequenced actions
- Layouts & Methods: Approaches that fit your home
- Best Practices: Proven rules we use in Edmonton homes
- Tools & Resources: Templates and pro tips
- Troubleshooting: Fix common remodel roadblocks
- Case Examples: Real scenarios from our projects
- FAQ: Clear answers to real homeowner questions
Quick Summary
Plan a kitchen remodel by locking goals, measuring accurately, mapping utilities, and sequencing work: demo, rough-ins, inspections, cabinets, surfaces, finishes, and final punch. Confirm lead times early. In The Meadows, coordinate with a licensed contractor to streamline permits, safety, and scheduling.
- Core outcome: A functional, safe, beautiful kitchen that supports how you live and cook.
- Order matters: Proper sequencing prevents rework and protects new finishes.
- Deliverables: Scaled plan, scope of work, product list with lead times, and a build schedule.
- Expected timeline: Planning 2–6 weeks; construction often 3–8+ weeks depending on scope.
- SSJ support: Licensed plumbing and electrical partners, interior finishing, and owner-led oversight.
What Is Planning a Kitchen Remodel?
Planning a kitchen remodel is the pre-construction process that transforms ideas into a buildable plan. It defines goals, layout, materials, code requirements, and a realistic sequence. Quality planning reduces delays, aligns expectations, and protects your investment from scope creep and rework.
At SSJ Construction & Renovations, we treat planning like a job within the job. The plan governs the schedule, orders, safety, and quality control. Strong planning is the difference between a smooth build and daily disruption.
- Inputs: Lifestyle goals, measurements, appliance specs, utility locations, and inspiration photos.
- Outputs: Scaled drawings, documented scope, selections list, permit requirements, and a build calendar.
- Why it matters: Clear plans prevent clashes (e.g., door swings vs. appliance clearance) and protect finishes.
- For The Meadows: We align plans with local home layouts and seasonal scheduling realities.
Why Planning Matters (Safety, Function, and Everyday Ease)
Planning matters because kitchens combine structure, plumbing, electrical, ventilation, and finishes in a tight footprint. A defined plan reduces risk, keeps trades coordinated, and ensures storage, lighting, and clearances support daily routines without compromise.
The kitchen is the busiest room in most homes. Missed details multiply quickly—one unplanned outlet or late appliance can ripple into cabinet changes and schedule gaps. In our experience across Edmonton homes, kitchens improve daily life when design decisions are anchored to real habits.
- Safety first: Proper circuits, GFCI protection, and ventilation are non-negotiable.
- Flow and ergonomics: The cooking “work triangle” or “work zones” shorten steps and reduce fatigue.
- Durability: Selections should match household traffic, pets, and cleaning routines.
- Resale confidence: Thoughtful planning supports future buyers and inspection standards.
Prerequisites Before You Begin
Before design, confirm readiness: document goals, take precise measurements, verify utility locations, list appliances, and identify must-keep items. Establish decision roles and daily-living plans during construction. These prerequisites prevent mid-project changes and keep momentum.
We see smoother projects when homeowners complete a short readiness sprint. It turns vague ideas into measurable decisions and reduces on-site improvisation.
- Goals & constraints: 3–5 must-haves (e.g., island seating) and 1–2 must-not-haves (e.g., glossy floors with dogs).
- Measurements: Room footprint; window/door sizes; ceiling height; existing plumbing and duct chases.
- Appliances: Select or shortlist now. Dimensions and venting drive cabinet and electrical plans.
- Keep vs. replace: Floors, windows, or bulkheads you want to preserve change sequencing and scope.
- Living plan: Temporary kitchen setup, dust control expectations, and quiet hours.
- Decision-making: Who signs off on selections and change approvals?
Planning a Kitchen Remodel: Step-by-Step
Sequence your remodel: define goals, measure, sketch layouts, lock appliances, finalize selections, order long-lead items, secure permits, and schedule trades. Build in this order: protect, demo, rough-ins, inspections, drywall, cabinets, surfaces, tile, paint, fixtures, and final punch.
Here’s the practical, do-once flow we use on Edmonton projects. Follow it, and you’ll avoid backtracking that inflates timelines.
- Define use-cases: Daily cooking, baking, entertaining, or meal-prep zones drive layout decisions.
- Measure and map: Create a scaled sketch with outlets, plumbing, windows, and vents labeled.
- Choose layout direction: Galley, L-shape, U-shape, or island—based on circulation and storage needs.
- Lock appliances early: Hood CFM, range width, and fridge door swing impact cabinets and power.
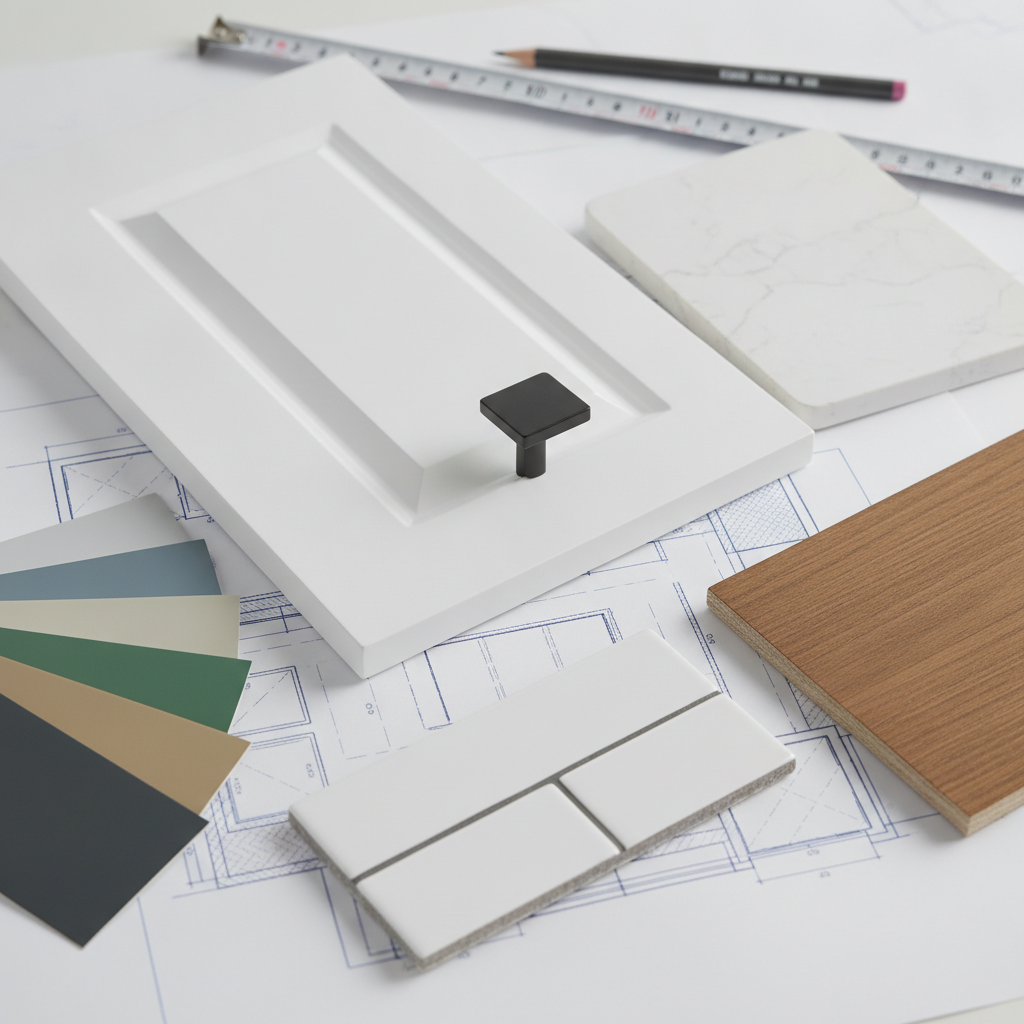
- Select finishes: Cabinets, counters, flooring, backsplash, hardware, lighting, and paint.
- Order long-lead items: Cabinets, specialty hoods, and custom counters often need advanced ordering.
- Document scope: Write a simple, line-by-line scope for transparency and scheduling.
- Permits & inspections: Confirm what’s required; schedule rough-in and final inspections in the plan.
- Pre-construction walkthrough: Align on protection, access routes, staging, and communication cadence.
- Construction sequence: Protect, demo, rough-ins, inspections, drywall/prime, cabinets, counters, tile, paint, fixtures, punch.
Timelines vary with scope and product lead times. For a deeper perspective on durations and dependencies, see this general look at kitchen remodel timelines.
Layouts, Methods, and Approaches
Choose layouts and methods that fit your footprint and habits. Galley and L-shape layouts excel in efficiency; U-shape and island layouts favor multitasking and entertaining. Decide between pull-and-replace versus structural changes to balance impact, disruption, and schedule.
Common layouts and when they shine
- Galley: Efficient for cooks, ideal in narrow spaces; prioritize lighting to keep it bright.
- L-shape: Flexible with room for a small island or breakfast table.
- U-shape: Maximizes counters; ensure clearances for multiple users.
- Island-centric: Great for entertaining and homework, but plan walkways and appliance clearances.
Approach spectrum
- Pull-and-replace: New finishes and fixtures in the same locations—fastest path to a fresh look.
- Light reconfiguration: Minor plumbing or electrical moves to improve function.
- Full rework: Open walls, new windows, or structural changes for maximum transformation.
Quick comparison table
| Option | Best for | Pros | Watch-outs |
|---|---|---|---|
| Pull-and-replace | Faster refresh | Lower disruption; predictable sequencing | Limited layout improvement |
| Light reconfiguration | Targeted function boosts | Better workflow and lighting | Some permitting and rough-in work |
| Full rework | Major transformation | Custom layout and storage | More coordination and staging needs |
Best Practices We Use on Every Kitchen
Define zones, protect the home, and verify rough-ins before finishes. Measure thrice, template once. Confirm appliance specs and clearances in writing. Keep daily site check-ins short and consistent. These habits minimize surprises and sustain momentum.
- Zones over triangle: Prep, cook, clean, and serve zones simplify traffic for families.
- Lighting layers: Ambient, task, and accent lighting make small kitchens feel larger and safer.
- Ventilation matters: Pair hood CFM to your range and duct length; plan make-up air if needed.
- Waterproofing details: Undersink mats and leak sensors are inexpensive insurance.
- Noise and dust control: Door seals, air scrubbers, and daily cleanup protect adjacent rooms.
- Material realism: Choose finishes you’ll maintain—matte hardware hides fingerprints better than polished.
Local considerations for The Meadows
- Schedule high-disruption tasks around school breaks to ease family routines near Silver Berry Park.
- Seasonal note: drywall and paint cure better with stable humidity; plan accordingly during shoulder seasons.
- Logistics: coordinate delivery windows to avoid peak times near Laurel Park and keep access clear for trades.
Tools, Templates, and Resources
Use simple tools: a scaled graph plan, a selections tracker, and a weekly schedule check. Add a photo log for site conditions. These lightweight templates help homeowners and contractors stay aligned and reduce last-minute decisions.
- Room map: 1/4-inch graph template with wall lengths, openings, and utility points.
- Selections tracker: One sheet listing brand, model, color, and ETA for each product.
- Schedule checklist: Week-by-week milestones with dependencies highlighted.
- Photo log: Pre-demo, rough-in, and pre-closeup pictures for documentation and future reference.
- Trade coordination notes: Shared list of questions and approvals to keep messages in one place.
For additional planning inspiration on layouts and finish coordination, this general overview of efficient renovation planning offers visual context you can discuss with your contractor.
Sequencing and Timelines (What to Expect)
Expect pre-construction planning, procurement of long-lead items, then a construction phase that flows from protection and demo to rough-ins, inspections, and finishes. Delays most often come from late selections, backorders, and mid-project scope changes.
- Pre-construction: 2–6 weeks to confirm drawings, order items, and book trades.
- Construction: Often 3–8+ weeks depending on structural changes and product lead times.
- Inspections: Integrate rough-in and final inspections into the calendar to avoid idle days.
- Contingencies: Plan buffer days around counter templating, tile layout, and final punch lists.
Want another perspective on schedule dependencies? Review this general write-up on project sequencing as a talking point with your contractor.
Troubleshooting Common Issues
When issues arise—like backordered cabinets, hidden wiring, or uneven floors—pause, document, and re-sequence the schedule. Protect installed finishes, and escalate decisions to the smallest viable change that preserves design intent and safety.
- Backorders: Confirm alternates before demo; list pre-approved substitutions by finish category.
- Surprise conditions: Old wiring, uninsulated walls, or moisture. Document with photos; bring in licensed trades.
- Layout conflicts: Interference between door swings, drawers, and appliances—resolve on paper before install.
- Floor flatness: Shims or self-levelers may be required; verify before cabinets and tile.
- Vent runs: Long or kinked ducts reduce capture; optimize routing during rough-in.
- Punch list drift: Keep a live list and close items weekly to avoid end-of-project fatigue.
Budget and Decision Factors (Without Numbers)
Prioritize spend where you interact daily—cabinets, counters, lighting, and ventilation. Keep layout shifts purposeful. Group cosmetic choices for harmony. Avoid late-stage changes; they’re the fastest way to extend schedules and risk rework.
- Impact areas: Durable cabinets, reliable appliances, and layered lighting return daily value.
- Keep plumbing in place when layout works—moving lines adds coordination and time.
- Plan for storage: Tall pantry cabinets, deep drawers, and tray dividers tame clutter.
- Think maintenance: Grout size, finish sheen, and hardware style affect cleaning time.
- Future-ready: Add outlets for smart devices and under-cabinet lighting controls.
Case Studies & Examples (Edmonton + The Meadows)
Real-world examples show how planning choices ripple through results. These brief scenarios illustrate layout calls, sequencing wins, and problem-solving we apply in Edmonton kitchens, including projects near The Meadows.
- Island vs. peninsula: A family cookspace added a compact island after we widened the walkway to 42 inches; prep and seating improved without crowding.
- Cabinet timing: We templated counters 48 hours after cabinet set by pre-leveling the subfloor—kept the schedule tight.
- Vent route shift: Reoriented a hood duct to a shorter exterior run; cooking odors dropped noticeably.
- Drawer strategy: Deep drawers by the range replaced lower doors; daily access sped up by minutes per meal.
- Lighting lift: Added task lights at prep zones; shadows disappeared and evening cooking felt safer.
- Floor protection: Ram board and edge guards preserved existing hardwood in adjacent halls.
- Backsplash layout: We centered a focal tile pattern on the hood line to maintain visual symmetry.
- Temporary kitchen: Set up a microwave, kettle, and fridge in the garage; routines stayed manageable.
- Moisture find: Behind old cabinets, we discovered minor vapor issues; addressing them improved comfort.
- Near Silver Berry Park: We phased noisy work to late mornings; neighbors appreciated the consideration.
- Pantry organization: Added pull-out trays and a broom closet; clutter cleared from counters.
- Laurel Park deliveries: Scheduled large deliveries midday to avoid neighborhood traffic pinch points.
How SSJ Works With You (Process Snapshot)
Our owner-led team scopes your vision, confirms measurements, coordinates licensed plumbing and electrical, and manages the build with clear, week-by-week check-ins. You get transparent communication, documented selections, and a satisfaction-guaranteed finish.
- Discovery: Goals, constraints, measurements, and photos.
- Design assist: Layout refinement and selections guidance you can actually live with.
- Plan & schedule: Documented scope, ordered products, and a target calendar.
- Build: Protection, demo, rough-ins, inspections, finishes, punch.
- Handoff: Walkthrough, maintenance tips, and a clean, ready-to-enjoy kitchen.
Free homeowner checklist: Want a printable selections tracker and sequencing checklist? Ask our team and we’ll share the simple templates we use on Edmonton projects.
Materials and Specs: Make Choices That Last
Balance durability and maintenance. Pair sturdy cabinet construction with hardware you’ll touch daily, choose counters that fit your cooking style, and select flooring that tolerates spills and pets. Document all models and finishes to avoid substitutions.
Cabinets & hardware
- Construction: Sturdy boxes with quality hinges and drawer slides last under daily use.
- Door styles: Shaker profiles remain versatile; flat panels suit modern spaces.
- Hardware: Matte finishes hide prints; confirm hole spacing before ordering.
Counters & backsplash
- Template accuracy: Clear overhangs and seam locations in writing before fabrication.
- Backsplash: Plan terminations at windows and cabinets for crisp lines.
Flooring & paint
- Flooring: Verify flatness; small format tile demands tighter tolerances than planks.
- Paint: Scrubbable sheens near prep zones simplify cleanup.

Plumbing, Electrical, and Ventilation (Licensed-Trade Priorities)
Treat plumbing, electrical, and ventilation as the backbone of safety and performance. Use dedicated circuits, GFCI where needed, proper pipe sizing, and well-routed ducting. Photograph rough-ins before drywall to document locations and protect future changes.
- Plumbing: Confirm sink, dishwasher, and fridge water line locations on the plan—avoid mid-install changes.
- Electrical: Map outlets for small appliances, under-cabinet lights, and charging stations.
- Ventilation: Short, straight duct runs improve capture and lower noise.
- Photo record: Keep a digital album of rough-in locations and valve shutoffs.
Site Protection and Living Through a Remodel
Control dust, noise, and access. Establish a temporary kitchen, define daily cleanup standards, and protect adjacent floors and walls. Clear site rules make living through a remodel manageable—especially for families balancing work and school schedules.
- Containment: Zipper doors and floor protection from day one.
- Temporary kitchen: Microwave, kettle, and pantry staples in a spare room or garage.
- Quiet hours: Align noisy tasks with your family schedule and neighbors’ expectations.
- Pets: Gate work zones to prevent escapes or injuries.
Tools You’ll Actually Use (Homeowner + Pro)
You don’t need a shop full of tools—just measurement basics, a clear plan, and a responsive contractor. Pros bring lasers, levels, and specialty gear; you bring decisive, documented selections and a shared checklist to keep decisions moving.
- Homeowner toolkit: Tape measure, angle finder, painter’s tape, and a phone for photos and notes.
- Pro toolkit: Laser levels, stud finders, tile saws, dust extraction, and safe electrical testing equipment.
- Communication: A single shared doc beats a dozen text threads for keeping decisions straight.
Frequently Asked Questions (FAQ)
These quick answers address the most common planning hurdles. Each response is concise, action-focused, and easy to reference during your remodel.
How do I start planning a kitchen remodel?
Start with goals, accurate measurements, and appliance selections. Sketch a scaled plan showing utilities and clearances. Create a selections list and lock long-lead items first. Then document a simple scope and timeline with your contractor before demo begins.
What order should a kitchen renovation follow?
Protect adjacent areas, then demo, rough-ins (plumbing, electrical, ventilation), inspections, drywall and prime, cabinets, countertop templating and install, backsplash, paint, fixtures, final electrical/plumbing, and punch list. Proper sequencing protects finishes and reduces rework.
Do I need permits to remodel my kitchen?
If you’re altering plumbing, electrical, ventilation, or structural elements, permits and inspections are typically required. Your licensed contractor coordinates permit requirements and schedules inspections so work is compliant and documented.
How do I live at home during the project?
Set a temporary kitchen with small appliances, plan easy meals, and establish dust and noise controls. Define daily cleanup standards and quiet hours with your contractor. A clear living plan keeps routines predictable during construction.
Key Takeaways
Write the plan, sequence the work, and document decisions. Early selections and accurate measurements prevent delays. A licensed, insured team keeps safety and inspections on track. Strong planning turns vision into a kitchen that works every day.
- Planning reduces surprises and protects finishes.
- Lock appliances and long-lead items early.
- Sequence work to avoid rework and downtime.
- Document selections, clearances, and rough-ins with photos.
- Live comfortably with a temporary-kitchen plan.
Considering a remodel in The Meadows? Let’s map your goals, measurements, and selections into a build-ready plan. Our licensed, insured team manages plumbing, electrical, flooring, painting, and finishing with clear communication.
Conclusion
Effective planning makes kitchen remodeling calmer, faster, and safer. Define goals, measure precisely, coordinate trades, and sequence installation. With SSJ’s owner-led process and licensed partners, Edmonton homeowners get dependable delivery and a kitchen ready for everyday life.
When you’re ready, bring your goals and a rough sketch. We’ll help convert them into a documented scope, selections plan, and week-by-week schedule you can trust.
Related Guides in Our Home Makeover Series
Explore connected renovation topics to round out your plan. From basement finishing to interior painting, thoughtful sequencing across rooms reduces disruption and helps your whole home feel cohesive.
- Whole-home makeover planning
- Finishing a basement for storage and living space
- Flooring choices for busy households
- Interior painting for durable, scrubbable walls
- Lighting layers that make kitchens safer
