
Luxury vinyl flooring installation is the process of fitting waterproof, resilient planks or tiles over a prepared subfloor to deliver a wood- or stone-look surface that stands up to daily wear. It installs quickly, resists moisture, and handles Edmonton’s seasonal swings—making it a smart choice for The Meadows homes and businesses.
By Sandeep Singh · Last updated: July 6, 2026
Overview and table of contents
This guide shows you how to plan, install, and maintain luxury vinyl floors with pro-level results. You’ll learn prerequisites, tools, step-by-step installation, local tips for The Meadows, a methods comparison, troubleshooting, and aftercare—plus when to call SSJ Construction & Renovations for expert help.
Whether you’re refreshing a single room or finishing a full basement, this complete guide blends do-it-right steps with local insight. SSJ Construction & Renovations is a licensed, insured Edmonton contractor known for quality craftsmanship and clear communication. Use this as your playbook and lean on us when you want a guaranteed finish.
- What luxury vinyl flooring installation involves—and why it works in The Meadows
- Prerequisites and subfloor prep most people skip (but shouldn’t)
- Step-by-step installation with pro checks at each stage
- Floating vs glue-down vs loose lay: when each method wins
- Tools, materials, and layout math you can trust
- Troubleshooting common issues before and after install
- Maintenance routines that keep floors looking new
Want help from a local team? See what we do at SSJ Construction & Renovations or bookmark this as your flooring installation near me reference for future rooms.
What is luxury vinyl flooring installation?
Luxury vinyl flooring installation is the professional placement of LVP/LVT planks or tiles over a flat, dry, clean subfloor with appropriate expansion gaps and transitions. The result is a durable, waterproof surface that mimics hardwood or stone while resisting dents, scratches, and temperature swings.
At its core, the process pairs the right product (plank thickness 4–8 mm; wear layer 12–20 mil; SPC/WPC core options) with a prepared base. Click-lock floating systems dominate residential projects; glue-down excels in high-traffic commercial areas. The Meadows homeowners often choose floating LVP for basements and main floors due to speed, repairability, and moisture resistance.
- Key components: planks/tiles, underlayment (when required), spacers, transitions, baseboards or quarter-round, and door trim adjustments.
- Performance drivers: subfloor flatness (within 3/16 in over 10 ft), moisture control (relative humidity within manufacturer spec), and expansion gap (typically 1/4 in).
- Where it shines: basements, kitchens, hallways, offices, and retail where water, snow, or grit are routine.
In our experience delivering renovations across Edmonton, getting the prep right is what separates a floor that clicks beautifully from one that creaks or shifts.
Why luxury vinyl matters for The Meadows homes and businesses
Luxury vinyl floors offer fast installation, realistic style, and rugged performance against moisture and temperature shifts. In The Meadows, that means comfortable basements, easy-clean entries, and serviceable retail and office spaces that keep daily life moving without disruption.
The Meadows sees freeze–thaw cycles and tracked-in grit. Luxury vinyl’s waterproof core and textured wear layer help resist winter moisture and everyday abrasion. It’s forgiving over large areas, integrates with radiant heat (check manufacturer limits), and supports swift turnarounds in tenant turnovers or office refreshes.
- Speed: Floating LVP installs quickly, so rooms get back in service fast.
- Moisture defense: Ideal for below-grade areas and wet entries.
- Design flexibility: Wide, long planks (7–9 in wide; 48–60 in long) create a premium look without hardwood upkeep.
- Repairability: Individual boards can be replaced if damaged.
- Comfort + acoustics: Attached pad or underlayment reduces footfall noise.
From basement finishing to commercial improvements, SSJ aligns product selection with how you actually live or work—so the floor supports the space, not the other way around.
How luxury vinyl installation works: step-by-step
Successful installs follow a clear sequence: acclimate, plan layout, prep subfloor, underlayment (if needed), first row square to the room, staggered joints, expansion gaps, clean cuts at doorways, and tidy transitions. Final steps include re-installing baseboards and a thorough sweep and inspection.
- Acclimate the product (24–48 hours): Keep boxes flat in the install room at 60–80°F with steady humidity.
- Measure and plan layout: Snap a control line; target balanced first/last rows (avoid slivers under 2 in).
- Prep the subfloor: Ensure flatness within 3/16 in over 10 ft; fill dips; sand high spots; vacuum thoroughly.
- Moisture checks: Concrete should meet manufacturer RH specs; keep crawlspaces and basements dry.
- Underlayment: Use manufacturer-approved pad if not attached; tape seams, no overlaps.
- First row: Leave a 1/4 in expansion gap with spacers; keep row dead straight along your control line.
- Staggered joints: Maintain 6–12 in end-joint offset; mix planks from multiple boxes for pattern variation.
- Click and lock: Engage long edge, then short edge; use a tapping block to seat joints without crushing.
- Doorways and obstacles: Undercut jambs; slide planks underneath for a clean, professional look.
- Transitions and trims: Install T-molds, reducers, or end caps where the floor meets tile, carpet, or exterior doors.
- Baseboards and quarter-round: Reinstall or add trims to cover expansion gaps; caulk and paint as needed.
- Final clean + inspection: Vacuum, damp mop (no standing water), and confirm all joints are fully seated.
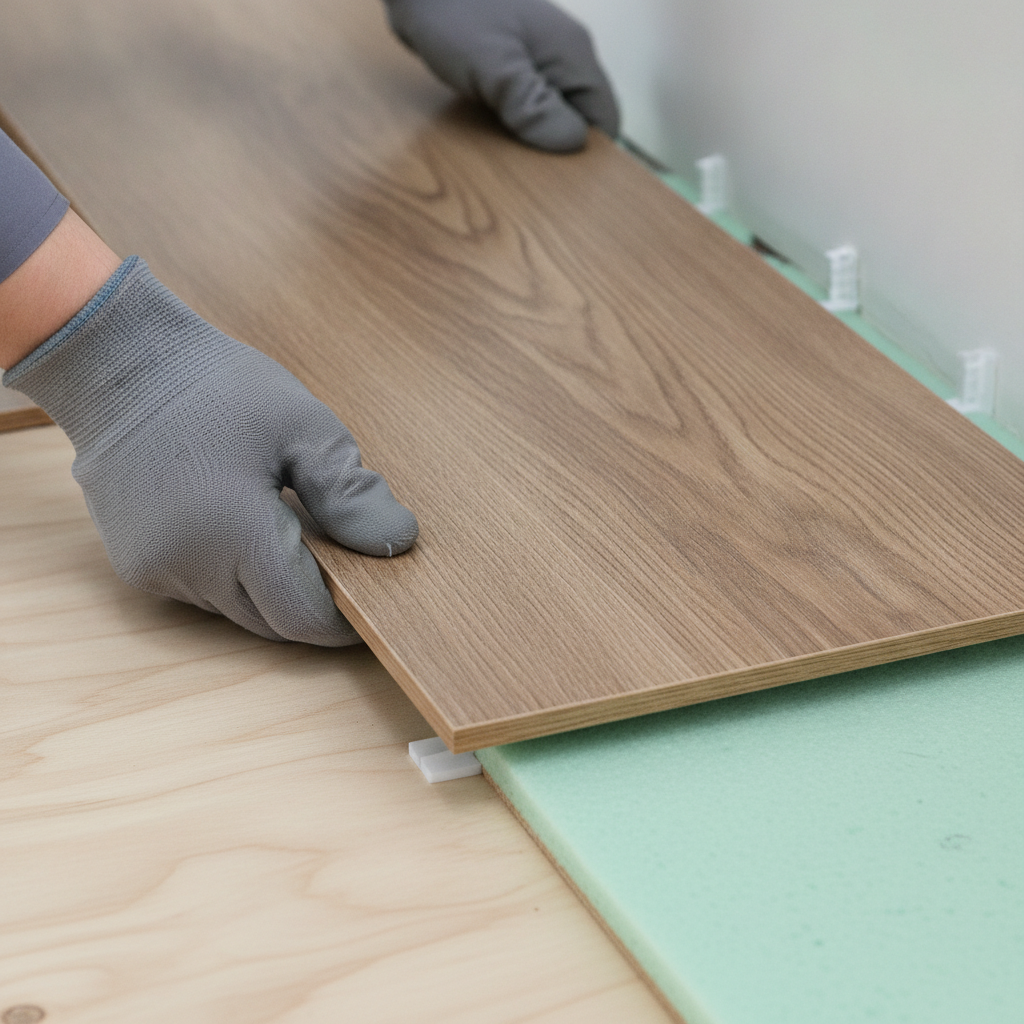
Pro tip: Check the first three rows carefully. If they’re straight, tight, and square, the remaining field will install smoothly. If not, reset now—it saves hours later.
Prerequisites and subfloor prep (don’t skip this)
Great vinyl floors start with flat, clean, and dry substrates. Verify moisture, correct dips and humps, remove debris, and plan for expansion gaps. Address squeaks and loose fasteners now. The better the prep, the tighter the click and the quieter the finished floor.
We treat prep as a separate mini-project. That includes a flatness check (3/16 in over 10 ft; 1/8 in over 6 ft is even better), moisture readings on concrete, and a fastener pass on wood subfloors to silence squeaks. In basements, we make sure there’s no hydrostatic pressure and that any prior leaks are fully resolved.
- Concrete: Shot-vac clean; patch low areas with floor-leveler; confirm RH per product spec.
- Plywood/OSB: Refasten loose panels; feather-level seams; remove staples and paint overspray.
- Radiant heat: Confirm max temperature and ramp-up schedule; many LVPs cap at ~80–85°F.
- Existing flooring: Remove soft goods; ensure old adhesives are flat and well-bonded if left in place.
- Expansion planning: Hold 1/4 in at perimeters and fixed objects; use wider trims if walls are out of square.
Local considerations for The Meadows
- Plan around winter dryness and summer humidity. Keep indoor RH stable during installation and the first 72 hours after.
- For busy family entries near Silver Berry Park, choose textured wear layers to hide grit and add traction.
- If you host gatherings by Laurel Park, consider wider planks (7–9 in) to visually expand living rooms.
Types and methods: floating vs glue-down vs loose lay
Choose floating click-lock for most homes and fast turnarounds, glue-down for high-traffic commercial zones and rolling loads, and loose lay for small spaces or quick repairs. Match method to subfloor, traffic, and moisture for the best long-term results.
| Method | Best for | Pros | Watch-outs |
|---|---|---|---|
| Floating (click-lock) | Homes, basements, condos | Fast install; easy repairs; pad for sound | Mind expansion; heavy cabinets shouldn’t pin the floor |
| Glue-down | Retail, offices, rolling loads | Stable under carts; thinner profiles | Adhesive cure times; substrate must be very flat |
| Loose lay | Small rooms, quick fixes | Speed; easy to lift and replace | Edge restraint needed; not ideal for large areas |
For broader context on scheduling an installation project from planning to punch list, this independent timeline article offers practical sequencing ideas: plan your flooring installation timeline. When comparing methods, also review general process differences highlighted in this flooring installation overview and browse sample vinyl categories to understand core and wear-layer options in the market vinyl product categories.
Tools and materials you’ll need
Gather everything before you start: measuring tools, saws and blades rated for vinyl, tapping block, pull bar, spacers, underlayment, moisture meter, and safety gear. Having the right kit prevents chipped edges, poor joints, and wasted time.
- Layout + measure: Tape, laser, chalk line, square, calculator for row math.
- Cutting: Fine-tooth miter saw, jigsaw with down-cut blade, utility knife for scoring.
- Seating: Tapping block, soft-face mallet, pull bar, knee pads.
- Prep: Floor scraper, sander, feather-finish compound, vacuum with HEPA filter.
- Moisture + environment: RH meter, moisture meter (concrete/wood), fans.
- Underlayment + trims: Approved pad, transition profiles, baseboards, color-matched caulk.
- Safety: Eye/ear protection, dust mask, gloves.
Don’t want to worry about tools, blades, or disposal? Our licensed Edmonton crew manages end-to-end flooring as part of complete renovations. You’ll see the plan upfront and know who’s onsite each day.
Best practices for a flawless finish
Respect expansion, control the environment, and protect the click. Mix boxes, stagger joints generously, and keep the first rows perfectly straight. Finish with clean trims and properly seated transitions for a crisp, professional edge.
- Control climate: Keep 60–80°F and steady RH during and 72 hours after install.
- Mind the first rows: Spend extra time here; everything builds from this reference.
- Joint staggering: 6–12 in offsets reduce pattern repeats and increase strength.
- Protect the click: Use a block; never hammer directly on edges.
- Door details: Undercut jambs instead of tight S-cuts for a cleaner look.
- Transitions: Use the correct profile at each threshold to avoid tripping and chipping.
- Trim + paint order: Dry-fit trims, then paint after installation for a sharp line.
Looking for more renovation pointers? Browse our in-house renovation tips or connect with our team for a walk-through of your space.
Thinking about handing this off? SSJ Construction & Renovations is a licensed, insured Edmonton contractor. We coordinate flooring with painting, trim, plumbing, and electrical so your project stays on time and on budget.
Request a flooring assessment and we’ll map your subfloor prep, installation method, and timeline.
Troubleshooting: 17 common issues and fixes
Most problems trace back to prep or environment. If boards separate, re-seat and stabilize humidity. If floors feel spongy, check subfloor flatness and pad choice. For noises, locate high spots, re-level, and confirm tight, debris-free joints.
- Gapping between boards: Re-seat with a block; confirm room is within temp/RH range; add expansion breaks over long runs.
- Peaking at seams: Remove pinch points (tight trims, cabinets); re-cut to restore expansion space.
- Creaking/clicking sounds: Vacuum debris from joints; level high spots; verify joints are fully engaged.
- Floor feels soft/spongy: Wrong pad or too thick underlayment; check substrate deflection and flatness.
- Telegraphing subfloor seams: Feather-finish over panel joints; ensure underlayment is compatible.
- Door won’t close: Undercut jambs and door bottoms rather than forcing tight S-cuts.
- Chipped edges after cutting: Use down-cut blades; cut face-down on jigsaws; support planks at exits.
- White lines at micro-bevels: Color-match seam sealer or use furniture markers sparingly.
- Cold-floor sensation in basement: Consider insulated underlayment; check for air leaks at rim joists.
- Uneven color mix: Shuffle boards from 3–4 boxes before laying.
- Planks unlocking under rolling loads: Consider glue-down zones for office chairs and carts.
- Water intrusion event: Lift affected area to dry; replace swollen boards; address source of moisture.
- Scratches from grit: Add entry mats and felt pads; choose higher wear-layer specs for busy zones.
- Bouncy feel on wood subfloors: Add fasteners and blocking where needed; ensure joist spacing meets code.
- Visible repeating patterns: Vary start lengths; rotate planks to break up repeats.
- Staining from rubber: Use non-staining mats; avoid black rubber feet on furniture.
- Radiant heat cycling issues: Follow ramp schedules; don’t shock-heat newly installed floors.
Maintenance and aftercare
Keep floors looking new with routine dust removal, damp mopping, and felt pads on furniture. Avoid steam and harsh solvents. Protect entries with mats and manage humidity to maintain stable joints and quiet performance year-round.
- Daily/weekly: Vacuum with hard-floor head; microfiber dust mop.
- Monthly: Damp mop with LVP-safe cleaner; no wax or polish unless manufacturer-approved.
- Seasonal: Check transitions and trims; renew felt pads; refresh caulk lines.
- Spills: Wipe promptly; don’t allow standing water to sit at seams.
- Sunlight: Use window coverings to reduce UV fade in bright exposures.
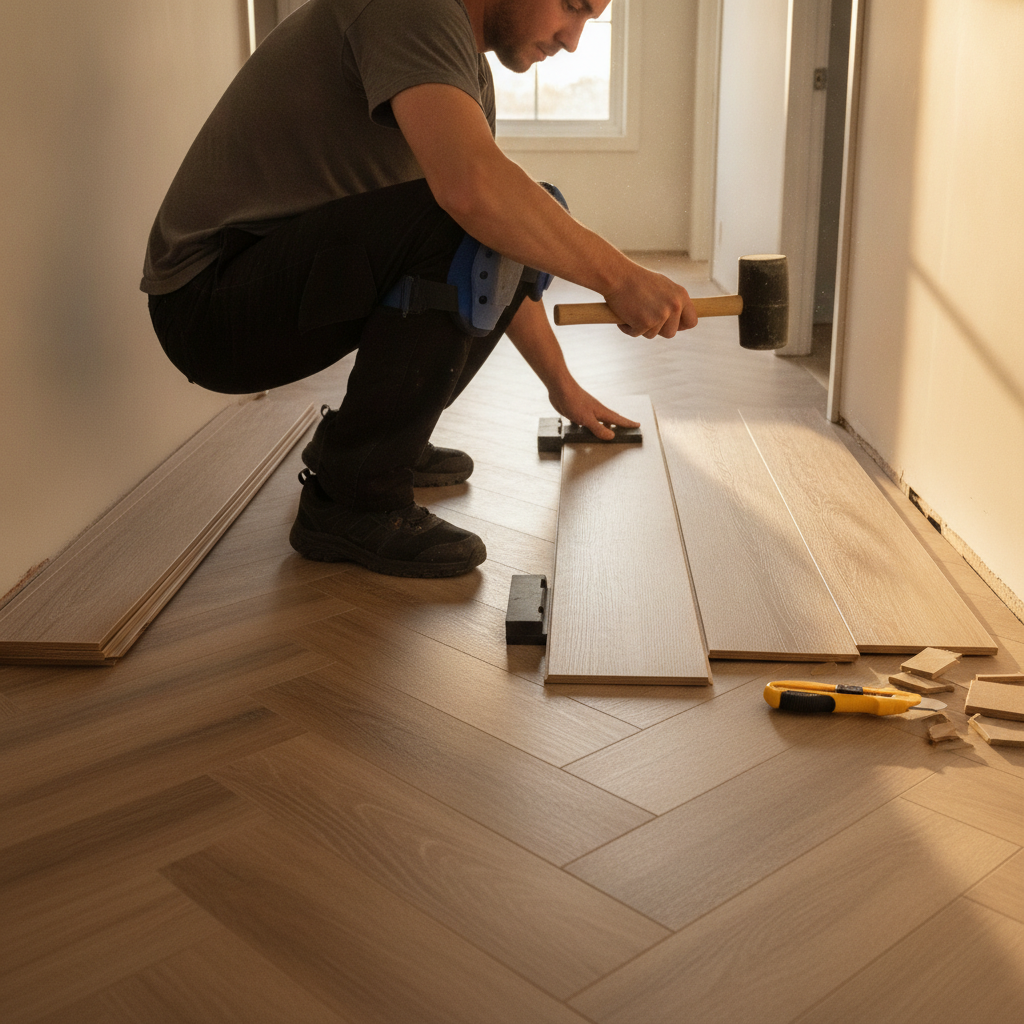
SSJ can bundle maintenance touch-ups into larger renovation phases—especially helpful when we’re also painting, updating trim, or finishing a basement on the same schedule.
Mini case studies: local examples from Edmonton
Real projects show how method, prep, and details affect results. These quick snapshots from our Edmonton work highlight why flatness, expansion, and transitions matter—and how luxury vinyl supports busy homes and commercial spaces.
- Basement family room, The Meadows: Floating LVP over levelled concrete; wide planks reduce seams; insulated underlay improved warmth by feel.
- Entry and mudroom: Textured wear layer and heavy-duty mats near neighborhood parks; clean transitions to tile at the garage door.
- Open-concept main floor: Balanced first/last rows prevented slivers at kitchen island; long runs broken with discreet T-molds.
- Home office refresh: Chair mats added; glue-down zone under rolling chair to prevent unlocking.
- Rental turnover: Loose-lay in a small bedroom for fast repair between tenants; trims swapped to accommodate thicker profile.
- Retail fitting area: Glue-down LVT in changing rooms; heat-welded seams at wet zones.
- Condo hallway: Acoustic underlay to satisfy strata requirements; careful door undercuts for fire-rated doors.
- Kitchen update: Floating LVP installed after cabinet set; toe-kicks adjusted; transitions to existing tile aligned with sightlines.
- Stairs solution: Coordinated stair nosings with matching finish to tie upper landing into hallway run.
- Basement suite development: Moisture checks, perimeter foam, and trims; durable finish stands up to tenants and snow season.
- Office corridor: Night work sequence with glue-down to minimize daytime downtime; walkable by morning.
Curious how this would look in your space? View our work and services at SSJ Construction & Renovations, or explore our early blog posts like this intro post as we continue expanding renovation resources.
Frequently asked questions
These quick answers cover the most common questions about luxury vinyl plank and tile. If you don’t see yours here, reach out and our Edmonton team will help you plan the right approach for your space and timeline.
How long should luxury vinyl acclimate before installation?
Most products acclimate for 24–48 hours in the install room at 60–80°F with steady humidity. Keep boxes flat and unopened during this period so planks adjust evenly to the environment.
Can luxury vinyl go over radiant floor heating?
Yes—confirm your product’s temperature limits and follow recommended ramp-up schedules. Many LVP/LVT lines allow radiant heat with a surface cap around 80–85°F and require gradual temperature changes.
Do I need underlayment with attached-pad planks?
Usually, no. Most attached pads replace separate underlayment. Use only manufacturer-approved layers to avoid excessive deflection or spongy feel, and always maintain proper expansion gaps at perimeters.
What’s the difference between LVP and LVT?
LVP is luxury vinyl plank with a wood look; LVT is luxury vinyl tile with stone or patterned looks. Performance is similar. Choose shape and finish based on design intent, traffic, and how it meets adjacent surfaces.
When should I choose glue-down over floating?
Pick glue-down for rolling loads, heavy commercial traffic, or where ultra-low transitions matter. Floating click-lock is ideal for most homes, basements, and quick turnaround renovations.
Key takeaways
Match method to use, prioritize prep, and control climate. Floating LVP serves most homes; glue-down suits rolling loads. Keep expansion space, stagger joints, and finish trims clean. When in doubt, call a licensed local contractor to validate your plan.
- Prep and moisture control drive long-term success.
- Click-lock floating installs quickly; glue-down excels in high-traffic zones.
- Use the right blades, blocks, and profiles for clean edges and quiet floors.
- Manage humidity around 72 hours after install to stabilize joints.
- Local help is close by—SSJ coordinates flooring with painting, plumbing, and electrical.
Conclusion: Ready when you are
Luxury vinyl flooring delivers style, speed, and durability when installed over a flat, dry, well-prepped subfloor. Use this guide to plan confidently—or bring in SSJ’s licensed Edmonton team to manage prep, installation, and finishes with guaranteed results.
If you’re comparing options or timing a larger renovation, we can stage flooring alongside painting, trim, and basement development so your household or business stays on schedule. Start at SSJ Construction & Renovations or request a flooring assessment today.
Want more from our team? Meet the author on our profile page and keep an eye on new posts beyond our early blog archive.
