
Kitchen remodeling services are the end-to-end design, permitting, and construction steps that transform how your kitchen looks and works. In The Meadows, partnering with a licensed, insured renovation contractor delivers code-compliant upgrades to cabinetry, lighting, plumbing, and electrical—so you get a brighter, safer workspace that fits daily life and entertaining.
By Sandeep Singh — SSJ Construction & Renovations
Last updated: 2026-06-27
At a Glance
A successful kitchen remodel balances layout, lighting, storage, ventilation, and code-compliant systems. Define goals, plan clearances, and finalize selections early. With licensed pros coordinating permits, plumbing, and electrical, you minimize dust and downtime—and end up with a kitchen that’s safer, brighter, and easier to clean.
Use this quick overview to orient your project and set expectations before you dive into drawings and materials.
- Scope covers design, permits, demolition, rough-ins, inspections, and finishing.
- Layout choices (galley, L-shaped, U-shaped, island) follow room size and traffic.
- Core trades: cabinetry, flooring, painting, plumbing, electrical, ventilation.
- Safety milestones include GFCI protection, grounded circuits, and ducted hoods.
- Early selections reduce change orders and speed up templating and installs.
Local considerations for The Meadows
- Coordinate deliveries and bin placement to avoid traffic spikes near 17 Street & 23 Avenue. Thoughtful logistics keep projects smooth and neighbor-friendly.
- Cold snaps affect ventilation tie-ins and paint curing; we stage interior work to maintain air quality and schedule any exterior penetrations carefully.
- Family traffic near Silver Berry Park peaks after school; we time louder demo and cutting to quieter windows so routines aren’t disrupted.
What Are Kitchen Remodeling Services?
Kitchen remodeling services include professional planning, permitting, demolition, and rebuilding of your kitchen’s structure and systems. Work spans cabinetry, countertops, flooring, lighting, ventilation, plumbing, and electrical—delivering a safer, brighter, and more efficient room for cooking, storage, and gatherings.
From The Meadows bungalows to modern townhomes, “remodel” usually means layout or system changes, while a “refresh” keeps the footprint but updates finishes. SSJ Construction & Renovations handles both ends of that spectrum—aligning design with real-world cooking, storage, and cleanup patterns.
Core components covered
- Layout and workflow: Work triangle, landing zones, and safe aisle clearances for smoother prep and cleanup.
- Cabinetry and storage: Durable boxes, soft-close drawers, and purpose-built organizers for daily reach.
- Surfaces: Resilient flooring, sealed countertops, and backsplashes that simplify cleaning.
- Lighting layers: Ambient, task, and accent lighting for visibility without glare or shadows.
- Mechanical systems: New supply/drain lines, dedicated circuits, and exterior-ducted hoods.
Clear scoping matters. When you define “must-haves” (seating, pantry, faster cleanup), we translate them into drawings and trade tasks that deliver those outcomes without surprises.
Why Kitchen Remodeling Matters
A well-planned remodel upgrades safety, function, and comfort. Better lighting lowers accidents, durable surfaces clean faster, and modern wiring and plumbing reduce risk. Thoughtful layouts shorten prep and cleanup time, while ventilation keeps air fresher for cooking and entertaining.
Here’s the reality: kitchens are hardworking spaces. When outlets, lighting, and storage match how you actually cook, the room stays organized with less effort—and looks great even on busy weeknights.
Everyday benefits you’ll notice
- Safety: GFCI protection in wet zones and dedicated appliance circuits reduce hazards.
- Air quality: Properly ducted hoods remove smoke, grease, and moisture from the home.
- Speed: Landing zones and wider aisles streamline prep, plating, and cleanup.
- Durability: Water-resistant flooring and sealed surfaces stand up to real use.
- Resale appeal: Timeless finishes and solid craftsmanship signal quality to buyers.
We’ve found that multi-layer lighting alone can cut task time noticeably—bright counters simply make prep, reading recipes, and cleanup smoother.
How Kitchen Remodeling Works
The process flows from discovery and design to permits, demolition, rough-ins, inspections, and finishing. A licensed contractor coordinates trades, orders materials, and controls dust and noise—so your family can live with fewer disruptions while the kitchen takes shape.
At SSJ Construction & Renovations, we document each step—so selections, dates, and trade handoffs are visible. That transparency keeps momentum and reduces mid-project texts and rework.
Step-by-step overview
- Discovery and goals: Define layout wishes, must-haves, and constraints with quick sketches and measurements.
- Design and selections: Cabinet plans, appliance specs, lighting layout, tile, and paint—finalized up front.
- Permits and ordering: Submissions, long-lead orders, and site protection (dust walls, floor covering).
- Demolition and prep: Careful removal, structural checks, and layout verification with laser measurements.
- Rough-ins: New plumbing lines, circuits, boxes, and vent routing—photographed for records.
- Inspections: City or third-party checks confirm safety and code compliance.
- Close-in: Insulation, drywall, mudding, and priming set the stage for finishes.
- Cabinetry and trim: Boxes set level and plumb, panels scribed, moldings aligned.
- Surfaces: Countertops templated, backsplash set, resilient flooring installed.
- Fixtures and lighting: Sink, faucet, appliances, and layered lighting energized and tested.
- Final walkthrough: Punch list completion and care instructions for long-term maintenance.
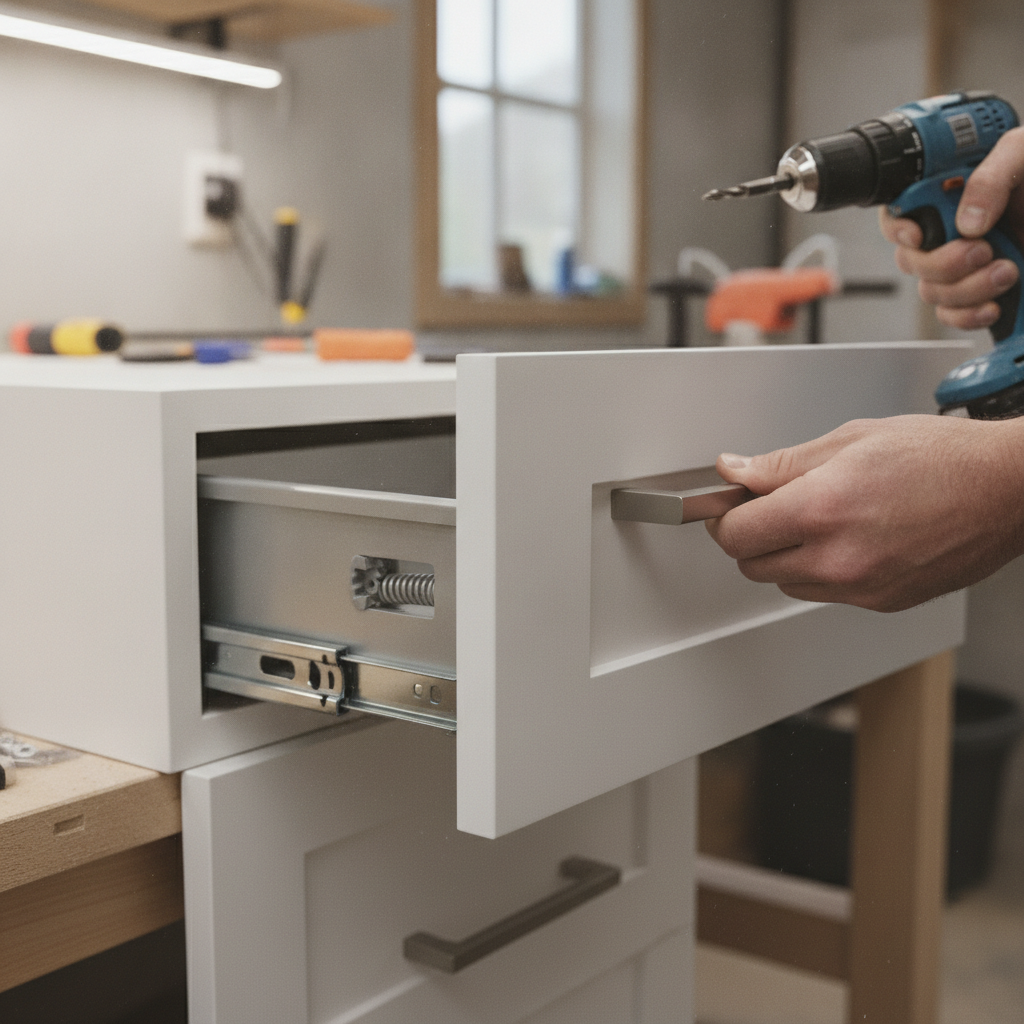
Owner vs. contractor responsibilities
| Phase | Owner focus | Contractor focus |
|---|---|---|
| Planning | Goals, inspiration, guardrails for scope | Feasibility, detailed measurements, drawings |
| Permits | Approve submissions and timing | Prepare, file, and track reviews |
| Build | Site access, timely decisions | Trade scheduling, quality checks, safety |
| Closeout | Walkthrough and warranty questions | Punch list, documentation, care tips |
Clear roles keep projects on schedule. You make decisions quickly; we execute with licensed trades and documented checkpoints.
Types of Kitchen Remodels
Most projects fall into four approaches: cosmetic refresh, partial remodel, re-layout with structural changes, and full gut with system upgrades. Your path depends on layout pain points, storage needs, mechanical limits, and how long you want the new design to serve.
In our Edmonton work, we choose the lightest lift that solves the real problem. If your layout works, we focus on lighting, storage, and surfaces. If the footprint fights you daily, we redesign clearances, appliance placement, and circuits.
Common approaches
- Cosmetic refresh: Paint, hardware, backsplash, and lighting swaps for a clean lift.
- Partial remodel: New counters and sink, added pantry storage, and refinished floors.
- Re-layout: Move appliances, add an island, widen clearances, and rewire lighting.
- Full gut: Open walls, upgrade plumbing/electrical, install new cabinets and surfaces.
Layout patterns we use often
- Galley: Efficient for narrow rooms; prioritize task lighting and landing space.
- L-shaped: Great corner storage and island seating; watch corner clearances.
- U-shaped: Maximizes counter runs; maintain comfortable aisle widths.
- Open-concept: Integrates with living/dining; define zones to control clutter.
Small details—pull-outs, tray dividers, and toe-kick drawers—reduce bending and keep counters clearer throughout the day.
Best Practices Our Edmonton Team Swears By
Prioritize safety, sightlines, and storage. Keep aisles generous, add task lights to every work zone, and choose moisture-smart materials near sinks and dishwashers. Document selections and changes to prevent rework and keep momentum.
In our experience, these rules prevent 80% of common headaches and make kitchens easier to live with.
Design rules of thumb
- Clearances: Keep main aisles generous so two people can pass safely without bumping into open appliances.
- Lighting layers: Mix ceiling fixtures with under-cabinet task lights to eliminate shadows at the counter.
- Landing zones: Leave space beside sinks and cooktops for hot pans and drying racks.
- Ventilation: Duct range hoods to the exterior; recirculating filters are a last resort.
- Water control: Use shut-offs, leak detectors, and sealed surfaces around wet zones.
Construction and closeout habits
- Site protection: Dust walls, floor protection, and daily cleanup routines keep the rest of your home livable.
- Trade sequencing: Tight handoffs between demo, rough-ins, drywall, and finishes avoid idle days.
- Documentation: Photos of rough-ins and final specs support future maintenance and upgrades.
- Walkthroughs: Early punch lists prevent last-week surprises and keep the finish line clean.
We maintain a shared selections board—finishes, model numbers, and dates—so everyone sees the same plan in real time.
Tools & Resources You Can Use
Combine a simple measurement kit with a selection tracker and reputable guidelines. Use a laser measure, blue painter’s tape for mockups, and a shared spreadsheet. Anchor decisions in published planning standards for clearances, outlets, and lighting.
Homeowners who prepare with these tools make faster, more confident choices—and projects move smoother as a result.
- Planning kit: Laser measure, blue tape, notebook, and phone camera for quick sketches and documentation.
- Selection tracker: Cloud spreadsheet for cabinets, counters, tile, fixtures, and lights.
- Standards: Use reputable kitchen planning guidelines for safe clearances and landing space.
- Energy tips: Favor LED lighting and right-sized hoods for efficiency and comfort.
- Permits: Review kitchen permit steps in Edmonton before you begin demolition.
For a contractor-selection checklist, see these practical pointers on choosing the right kitchen remodeling contractor—a helpful overview of references, insurance, and communication to vet during interviews.
Planning, Scheduling, and Sequencing
Great schedules start with final selections and clear roles. Lock cabinets, counters, tile, and fixtures early; then sequence demo, rough-ins, inspections, and templates. Visual boards and weekly check-ins keep decisions ahead of the crew.
We plan “decision lead time” into calendars. When clients confirm finishes before demo, templating and deliveries line up, and site days compress. That’s how we protect momentum.
Our scheduling playbook
- Milestone map: Discovery, selections, permits, demo, rough-ins, inspections, close-in, cabinets, tops, tile, trim, final.
- Buffers that matter: Inspections, countertop templating, and backsplash cure times.
- Communication cadence: Weekly updates, photo logs, and day-ahead texts for any noisy work.
- Contingency thinking: Have alternates for long-lead items and a plan for weather-sensitive work.
For a plain-English view of timeline expectations, this short read on a typical kitchen remodel timeline can help you visualize phases from demo to punch.
Quality Assurance and Safety Checks
Quality is built into every step: measure twice, protect the site, document rough-ins, and verify safety. Electrical, plumbing, and ventilation get tested and photographed before close-in—so what’s behind the walls is as clean as what you see.
SSJ Construction & Renovations is licensed and insured, with trade partners for plumbing and electrical when needed. We back work with a satisfaction guarantee and visible craftsmanship that clients in Edmonton consistently mention in testimonials.
Our QA checklist highlights
- Measurement integrity: Laser-verified layouts, level checks, and cabinet reveals confirmed before fasteners.
- Electrical safety: GFCI/AFCI protection where required, labeled breakers, and appliance circuits verified under load.
- Plumbing assurance: Pressure tests on new lines, shut-offs at fixtures, and trap/vent path confirmation.
- Ventilation verification: Exterior duct terminations, backdraft dampers, and airflow checks.
- Documentation: Photos, manuals, and finish schedules stored for your records.
If you want a concise overview of planning priorities beyond the kitchen, this guide to kitchen and bathroom renovations outlines prep steps and finish choices that translate well to any home makeover.
Pricing Factors & Value (No Dollar Amounts)
Total investment hinges on scope, layout changes, and material/fixture choices. Structural moves and system upgrades add complexity, while keeping the footprint and reusing serviceable elements reduces disruption. Clear goals and early selections prevent change orders and protect timelines.
We never publish numbers because every home is unique—but we do publish process. Finalize 90% of selections before demolition, and you’ll finish sooner with fewer compromises. That’s the single best lever for outcomes without discussing dollars.
What shapes investment
- Scope: Cosmetic refresh versus full gut with re-layout and structural work.
- Systems: Plumbing moves, panel capacity, circuit needs, and vent routing.
- Materials: Cabinet construction, surface durability, and finish complexity.
- Site realities: Access, condo or HOA rules, and unforeseen conditions.
- Schedule: Lead times, inspection cycles, and decision speed.
Clear priorities—what matters most for how you live—let us steer spend toward big daily wins like lighting and storage.
Case Studies & Real Examples from The Meadows
Local kitchens succeed when design matches daily life. These scenarios from The Meadows show how layout tweaks, storage upgrades, and clean mechanical work deliver safer, calmer spaces—without unnecessary disruption to routines or neighbors.
Open galley to family hub
A galley near Silver Berry Park needed better flow and brighter prep space. We removed a short wall, added an island with seating, and re-circuited small-appliance outlets. New under-cabinet LEDs brightened task zones. The family now preps, eats, and does homework in one place—noise and clutter under control.
Compact condo, big storage
Close to 17 Street & 23 Avenue, a compact kitchen lacked pantry capacity. We built full-height cabinets with pull-outs, added a slim drawer microwave, and swapped the sink base for deeper storage with shut-offs. The owner gained two extra feet of usable counter for coffee gear and baking trays.
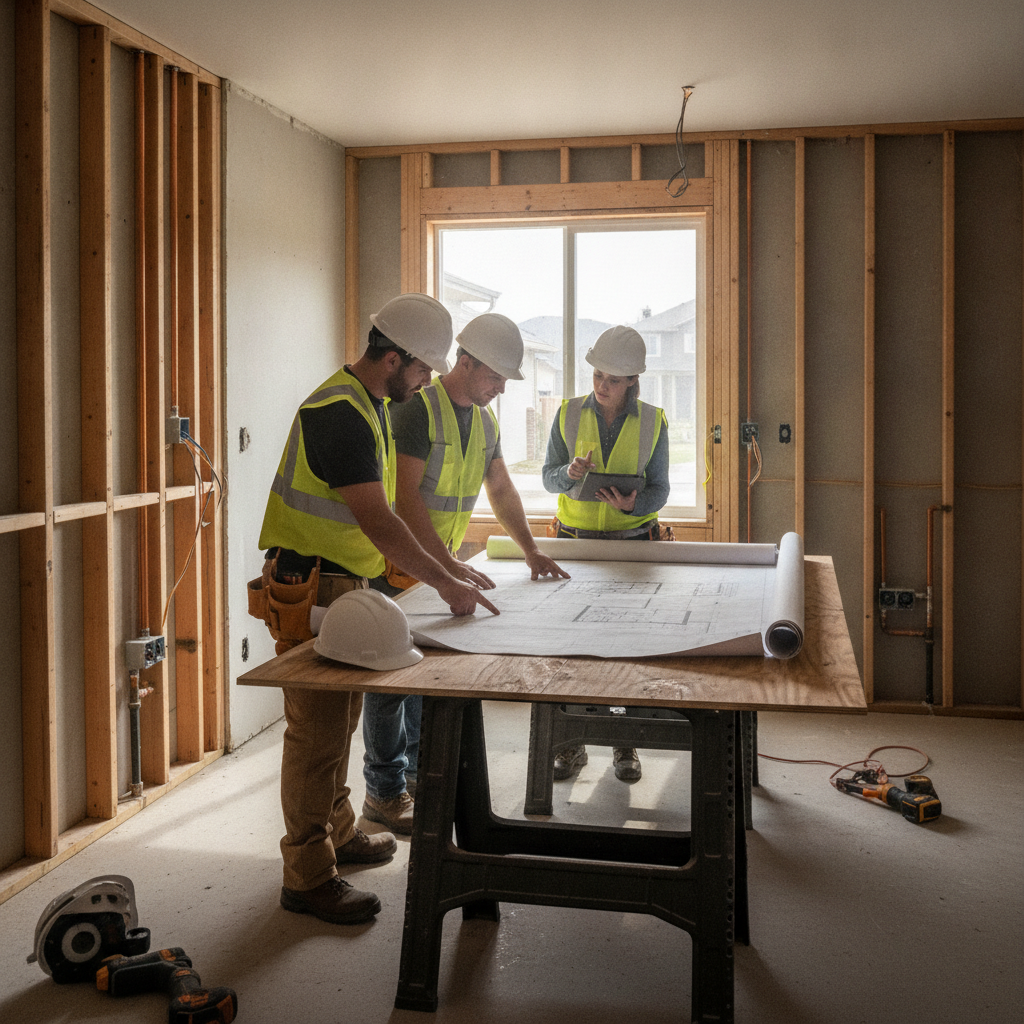
Builder-grade to timeless
We replaced worn floors, installed durable countertops, and added a properly ducted hood. Drawer bases replaced hard-to-reach lowers. The result feels brighter, functions better, and stays tidy with less effort—even with the same footprint.
Free planning session: If you live in The Meadows, our licensed team can review layout options, electrical capacity, and ventilation routes and give you a clear project plan—no pressure.
Frequently Asked Questions
Most homeowners want to know timelines, permits, and how to live through a remodel. Here are direct answers so you can plan confidently and avoid mid-project surprises.
What should I decide before requesting kitchen remodeling services?
Define goals (more seating, storage, or light), preferred layout style, and a short list of must-have finishes. Gather a few inspiration photos and measurements of the current kitchen. With those basics, a licensed contractor can draft options and spot electrical or plumbing upgrades early.
Do I need permits for a kitchen remodel in Edmonton?
Permit needs depend on scope. Layout changes, new circuits, plumbing moves, or structural work typically require permits and inspections. Your contractor should prepare submissions, schedule inspections, and ensure work meets local code and safety standards.
How long does a typical kitchen remodel take?
Timelines vary with scope and lead times. Cosmetic refreshes can move quickly, while re-layouts with system upgrades take longer due to permits, rough-ins, and inspections. A clear plan, early selections, and fast decisions help projects move efficiently.
Can I live at home during the renovation?
Yes, most clients stay home. We set up dust control, daily cleanup, and a temporary kitchen zone. Noisy or high-impact tasks are scheduled during agreed hours. Good communication keeps routines predictable while work progresses safely.
Key Takeaways
Define goals early, anchor design in reputable guidelines, and coordinate permits, trades, and selections ahead of the crew. With disciplined sequencing and licensed pros, your kitchen remodel finishes faster, functions better, and stays safe for years.
- Finalize 90% of selections before demolition begins.
- Use proven clearances, landing zones, and lighting layers.
- Plan inspections and templating buffers to protect momentum.
- Document rough-ins and finish specs for easy maintenance.
- Engage licensed plumbing and electrical trades for safety.
Related Renovation Topics
Kitchens connect to whole-home flow. Explore basement finishing, interior painting, and electrical upgrades to round out your home makeover plan. Coordinated projects reduce disruption and deliver a consistent look across your space.
If you’re mapping a broader home makeover, consider sequencing connected work—basement finishing, interior painting, or electrical upgrades—so colors, lighting, and materials stay consistent room to room.
