
A home makeover is a coordinated refresh of rooms, finishes, and systems that improves how a house looks, functions, and feels. In The Meadows, a successful home makeover aligns design with daily routines, upgrades key rooms, and sequences work to minimize disruption. With SSJ Construction & Renovations, you get licensed, insured execution backed by clear communication.
By Sandeep Singh · Last updated: 2026-07-02
Overview and Table of Contents
This complete guide shows homeowners in The Meadows how to plan and deliver a home makeover that boosts comfort, storage, and style. You’ll learn the process, room-by-room priorities, proven best practices, tools, and local tips—plus real scenarios from SSJ Construction & Renovations so you can move from ideas to finished spaces with confidence.
Use this guide to plan a practical, sequenced transformation that fits your routines and long-term goals. We highlight kitchens, bathrooms, basements, paint, flooring, plumbing, and electrical—services our Edmonton team performs daily.
- What a home makeover includes (and what it doesn’t)
- Why makeovers matter for comfort, safety, and resale appeal
- How to plan: scope, permits, selections, sequencing
- Room-by-room approaches: kitchen, bath, basement finishing
- Interior painting, flooring, plumbing, electrical upgrades
- Best practices and common pitfalls to avoid
- Tools, checklists, and SSJ case examples
- Local considerations for The Meadows
- FAQ and next steps
What Is a Home Makeover?
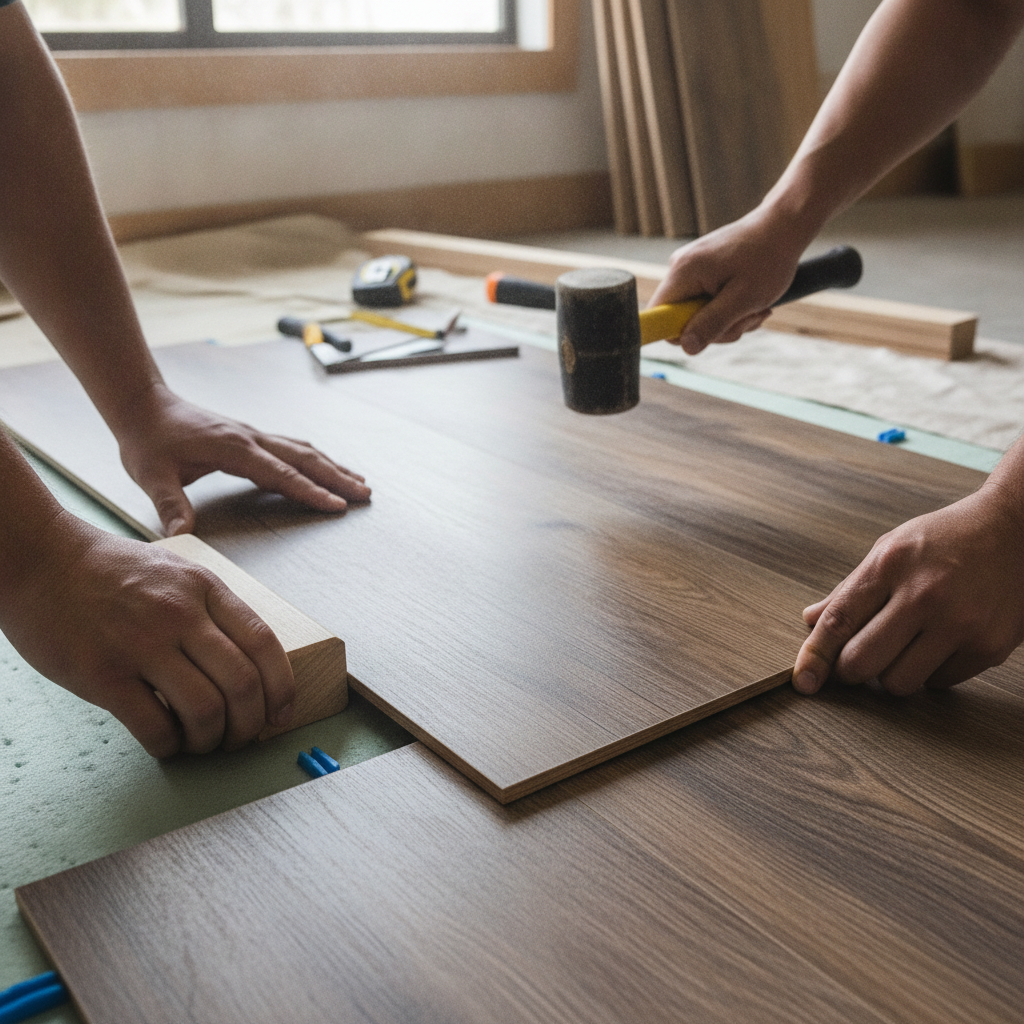
A home makeover is a coordinated set of cosmetic and functional upgrades—paint, flooring, lighting, storage, and targeted room improvements—completed in a defined sequence. Unlike gut renovations, makeovers focus on fast visual impact and daily usability while preserving sound structure and leveraging existing layouts where possible.
Think of a makeover as focused transformation. You re-energize the home’s look, remove daily friction points, and dial in lighting, storage, and finishes. SSJ Construction & Renovations typically aligns makeovers to daily rhythms—morning rush, homework zones, meal prep—so the upgrades solve real-life bottlenecks, not just aesthetics.
- Cosmetic upgrades: Interior painting, trim refresh, cabinet resurfacing, lighting swaps.
- Surface replacements: Flooring installation (LVP, hardwood, tile), updated plumbing and electrical fixtures.
- Targeted rooms: Kitchen refresh, bathroom improvements, basement finishing for livable space.
- Light carpentry: Feature walls, built-ins, new doors/handles, improved closets.
- Systems tune-ups: GFCI where needed, modern LED lighting, quiet exhaust fans, safer shutoffs.
Here’s the thing: a makeover should earn its keep every single day. We design scopes that show results within days or weeks for many surfaces, then phase larger items to protect family routines.
Why a Home Makeover Matters
A focused home makeover improves daily comfort, safety, and storage while modernizing style. The biggest wins come from re-lighting dark areas, upgrading durable surfaces, and optimizing high-traffic rooms. These upgrades reduce maintenance headaches and help future buyers instantly understand the home’s value.
In our experience across Edmonton homes, three outcomes consistently stand out: better light, better flow, and better storage. When lighting layers, walk paths, and cabinet interiors all work together, morning routines shrink, cleaning gets easier, and rooms feel calm.
- Comfort you feel: Warmer color temperatures in living areas, quieter vent fans in baths, softer-close hardware.
- Safety you notice: Proper GFCI near water, upgraded smoke/CO detectors, tamper-resistant outlets.
- Durability that lasts: Scrape-resistant LVP (often 5–7 mm thick) stands up to pets and winter boots.
- Energy savings: LED lighting draws far less power than older bulbs and runs cooler.
- Resale clarity: Fresh paint, modern lighting, and move-in-ready basements make showings faster and simpler.
Small detail, big payoff: matching 2700–3000K LED lamps across common spaces calms color jumps room to room. A consistent palette reads as intentional—and that translates to perceived quality.
How a Home Makeover Works (Process)
The best home makeovers follow a clear sequence: define goals, confirm scope, secure materials, prepare the home, execute dusty work first, finish with paint and fixtures, and do a final walk-through. SSJ coordinates trades—flooring, painting, plumbing, electrical—so your days stay predictable.
We’ve found that predictable sequencing prevents rework and dust spread. Here’s a high-level view of the steps we use on Edmonton projects.
| Phase | Primary Tasks | Owner Decisions | Notes |
|---|---|---|---|
| 1) Discovery | Walk-through, measure, document pain points | List must-haves vs. nice-to-haves | Group items by room to reveal quick wins |
| 2) Scope & Selections | Finalize rooms, finishes, and fixtures | Approve paint palette, flooring, lighting | Lock selections before scheduling trades |
| 3) Prep & Protection | Floor protection, dust barriers, staging | Clear pathways and fragile items | Plan pet/kid safety zones |
| 4) Rough Work | Framing, electrical, plumbing, drywall | Confirm outlet/lighting locations | Do loud/dusty tasks first |
| 5) Surfaces | Flooring installation, tile, trim | Review transitions and grout lines | Keep rooms closed as floors cure |
| 6) Finishes | Interior painting, hardware, lighting | Check sheen and color under evening light | Touch-up list grows small here |
| 7) Final Pass | Fixture setting, cleanup, handover | Walk-through and punch list | We document care instructions |
- Lead times: Many fixtures arrive in 5–14 days; order early to avoid gaps.
- Paint reality: Most interior paints are dry to touch in 1–2 hours and ready for recoat at 3–4 hours, depending on product and humidity.
- Flooring acclimation: LVP typically acclimates 24–48 hours indoors before install.
Pro tip: reserve a “staging corner” for boxes, tools, and drop cloths. A dedicated zone keeps family areas tidy and speeds each trade’s setup.
Types of Home Makeovers (Room-by-Room)
Prioritize rooms that carry the most daily load—kitchens, bathrooms, and family zones—then layer in paint, flooring, lighting, and storage. SSJ delivers kitchen refreshes, bathroom improvements, and full basement finishing, alongside interior painting, flooring, plumbing, and electrical upgrades that tie the whole home together.
Kitchen refresh and remodel
- High-ROI moves: LED under-cabinet lighting, fresh cabinet paint, modern pulls, quiet dishwasher hookup.
- Layout tweaks: Add a pot-filler, relocate microwave, or widen work aisles to 42 inches for two cooks.
- Surfaces that last: Tile backsplash with stain-resistant grout; water-resistant LVP near the sink zone.
- Edmonton example: We recently re-lit a galley kitchen in The Meadows; layered task lights cut shadows across the prep line and made weeknight cooking feel easier immediately.
Bathroom improvements
- Ventilation first: A quiet, properly ducted fan clears moisture; target low sone ratings for comfort.
- Fixture clarity: Single-lever faucets simplify temperature control and reduce splash.
- Slip-smart floors: Matte tile or textured LVP near tubs and showers improves traction.
- Quick win: Swap a dated vanity light for a bar that throws even light across the mirror—no harsh down-shadows.
Basement finishing and development
- Space planning: Frame in a TV lounge, kid zone, or guest suite with closet and egress-aware layout.
- Acoustics: Insulated walls and solid-core doors help contain noise between floors.
- Comfort: Add warm white recessed LEDs and low-profile baseboard options for clean lines.
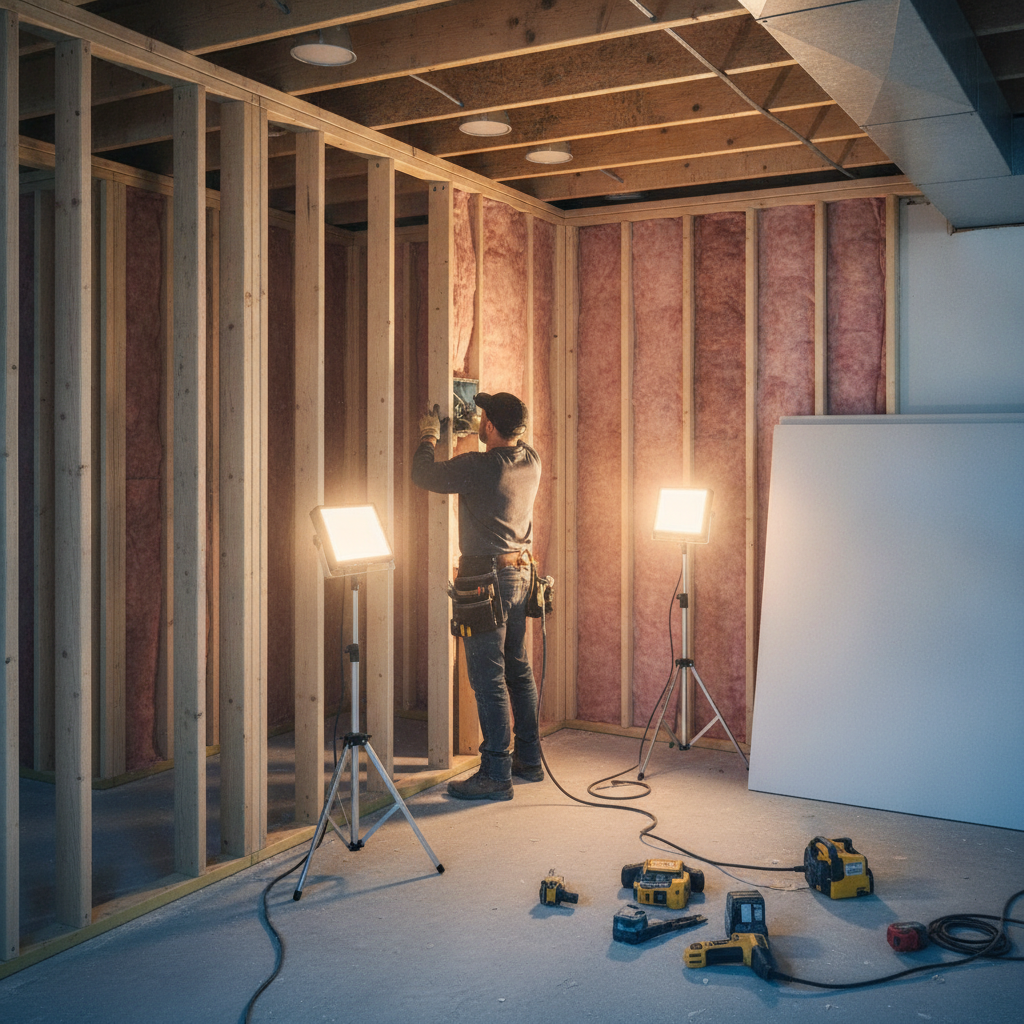
- Our work: SSJ converts unfinished basements into daily-use family space—framing, electrical, plumbing rough-ins, drywall, paint, trim, and flooring.
Interior painting and trim
- Palette planning: Choose two to three neutrals plus one accent; keep undertones consistent for flow.
- Sheen strategy: Matte or eggshell for walls, semi-gloss for trim/doors.
- Practical rhythm: Cut in, roll walls, doors last; ventilate rooms for faster cure.
Flooring upgrades
- Family-friendly: Luxury vinyl plank handles spills, scratches, and temperature swings well.
- Transitions: Align planks across doorways to reduce visual breaks, and use reducers where needed.
- Noise-aware: Underlayment helps dampen footfall—handy for basements and second-floor halls.
Plumbing and electrical safety upgrades
- Kitchen and bath: GFCI-protected receptacles where water is present; modern shutoffs that actually turn easily.
- Lighting layers: Ambient (overhead), task (under-cabinet), and accent (pendant) circuits on dimmers for control.
- Practical reality: Labelled panels and accessible shutoffs save stress during maintenance.
Best Practices That Keep Projects Smooth
Successful makeovers protect the home, lock decisions early, and sequence work to avoid backtracking. Use dust control, stable palettes, quality caulks and paints, and clear daily check-ins. SSJ’s owner-led approach keeps communication tight so surprises are handled before they ripple through the schedule.
- Decide once: Finalize colors, fixtures, and hardware before scheduling—late swaps slow crews and create mismatches.
- Protect surfaces: Ram board, door jamb guards, and plastic zippers limit scuffs and dust travel.
- Map traffic: Keep one bathroom and key hallways open whenever possible; phase rooms in a live-in strategy.
- Photograph walls: Shoot pictures of framing and rough-ins before drywall to document studs and lines.
- Standardize lamps: 2700–3000K LEDs in living zones; brighter task lighting on counters and benches.
- Quiet wins: Soft-close hinges, felt pads under chairs, and weatherstripping at entry doors reduce daily noise.
- Walk-through habit: A 10-minute daily check-in keeps punch lists small and momentum high.
Local considerations for The Meadows
- Plan deliveries and crew parking to keep access clear near Silver Berry Park during busy hours, especially on weekends.
- Seasonal tip: schedule exterior-adjacent tasks (like door replacements) for warmer weeks; winter cold snaps can extend cure times indoors.
- Logistics: confirm early-morning arrival windows for trades if you rely on buses near 17 Street & 23 Avenue; predictable starts reduce household disruption.
Tools and Resources (Homeowner + Pro)
Plan with simple tools you’ll actually use: a shared checklist, a selections board with swatches, and a week-by-week calendar. Add labeled bins for rooms, painter’s tape for notes, and a central “staging corner.” These small systems cut questions, keep momentum, and make punch lists shorter.
- Room-by-room checklist: Track paint colors, sheen, trim profile, flooring type, and hardware finish.
- Selections board: Keep cabinet color, countertop sample, backsplash tile, and flooring swatch together.
- Lighting plan: Note lamp color (K), dimmers, and switch locations to avoid late changes.
- Pro reading: This comprehensive renovation guide offers a homeowner-friendly overview of planning and staging.
- Whole-home planning: See a full home renovation walkthrough for sequencing ideas you can adapt.
- Kitchen inspiration: Browse a kitchen refresh breakdown for practical upgrade paths.
We share progress photos and quick videos with homeowners so decisions are easy to review after work. Clear records reduce second-guessing and help with future maintenance.
Case Studies and Real-World Examples
SSJ Construction & Renovations delivers makeovers that respect family routines while upgrading finishes and safety. Below are distilled scenarios from recent Edmonton projects that show how tight scopes, early decisions, and owner-led communication shorten timelines and improve results.
Scenario 1: Kitchen + Entry Flow in The Meadows
- Pain points: Dark prep area, tight fridge door swing, messy shoe pile at the back entry.
- Scope: LED under-cabinet strips, cabinet paint and pulls, 42-inch aisle target, LVP with flush transition at entry.
- Outcome: Even task lighting removed shadows; new pulls and hinges modernized the look; floor upgrade unified kitchen and hallway for a larger feel.
Scenario 2: Family Bath Noise + Moisture
- Pain points: Loud fan, fogged mirror, slippery floor after showers.
- Scope: Quieter fan on a timer switch, matte floor tile, brighter vanity bar with uniform spread.
- Outcome: Morning routines sped up; mirror stayed clear; floor traction increased without a color clash.
Scenario 3: Basement Finishing for Flexible Space
- Pain points: Unfinished storage-only basement; no quiet spot for calls or homework.
- Scope: Frame TV lounge and desk nook, add outlets and warm white recessed LEDs, insulate shared walls, install durable LVP.
- Outcome: New everyday living area added seating and a quiet corner; insulated walls improved upstairs noise comfort.
Thinking about a home makeover in The Meadows? Let SSJ Construction & Renovations map a phased plan that fits your family’s schedule. We coordinate painting, flooring, plumbing, and electrical under one roof—so you have one accountable team from start to finish.
Frequently Asked Questions
Homeowners usually ask about timelines, living through work, permits, and how to prioritize rooms. Here are clear, direct answers based on our day-to-day projects across Edmonton—so you can plan confidently and avoid the most common roadblocks.
How do I prioritize rooms for a home makeover?
Start with kitchens, bathrooms, and high-traffic family zones. These areas affect daily routines the most. Then layer in paint, flooring, lighting, and storage upgrades across the rest of the home. A short discovery walk with SSJ reveals quick wins you’ll feel right away.
Can we live at home during the renovation?
Often, yes. We phase work to keep one bathroom and key hallways open, set dust barriers, and schedule loud tasks earlier in the day. A dedicated staging corner and nightly cleanup keep family areas usable while crews progress through rooms.
Do I need permits for a home makeover?
Permits are typically required when work involves structural changes, new electrical circuits, or plumbing modifications. Cosmetic updates like paint and most flooring swaps don’t. We clarify scope up front and coordinate required inspections as part of our process.
What’s the basic sequence we should expect?
Plan, select finishes, protect spaces, do rough work first (framing, electrical, plumbing), then surfaces (flooring, tile, trim), and finish with paint, hardware, and lighting. A final walk-through closes with a small punch list and care instructions.
How do you keep projects on schedule?
We lock selections early, order materials in advance, and coordinate in-house crews and trade partners. Daily check-ins, photo updates, and a single accountable lead reduce surprises. This owner-led approach is how we finish on time and on budget.
Key Takeaways
Plan makeovers around daily life, decide finishes early, and sequence dusty work first. Focus kitchens, baths, and basements for the biggest impact, then paint, flooring, and lighting to unify style. One accountable team—SSJ Construction & Renovations—keeps the project predictable from kickoff to handover.
- Define must-haves, choose finishes, and stage a tidy work zone.
- Prioritize high-traffic rooms; layer lighting for comfort and control.
- Use durable surfaces like LVP and semi-gloss trim paints.
- Protect floors and paths to cut cleanup and touch-ups.
- Owner-led communication keeps momentum and clarity high.
Conclusion: Your Next Step in The Meadows
A well-planned home makeover boosts comfort fast and sets your home up for years of easier living. When a single team coordinates painting, flooring, plumbing, electrical, and finishing touches, the result feels seamless—and your routines stay intact.
Ready to map your project? SSJ Construction & Renovations will build a phased plan for your The Meadows home, sequence the work to fit your schedule, and deliver the daily improvements you’ll notice right away. Book a friendly discovery call and let’s design the first small win together.
